Are you looking to elevate the aesthetic appeal and functionality of your home without breaking the bank? Look no further! DIY floating shelves are the perfect solution to transform your space, adding both style and storage in a sleek, modern way. Whether you’re aiming to display your favorite decor, organize daily essentials, or simply add a touch of elegance to your walls, these versatile shelves can do it all. In this guide, we’ll walk you through the process of creating your own stylish floating shelves, providing you with inspiration, tips, and step-by-step instructions to make your DIY project a resounding success. Get ready to unleash your creativity and give your home the makeover it deserves!
Choosing the Right Materials for DIY Floating Shelves
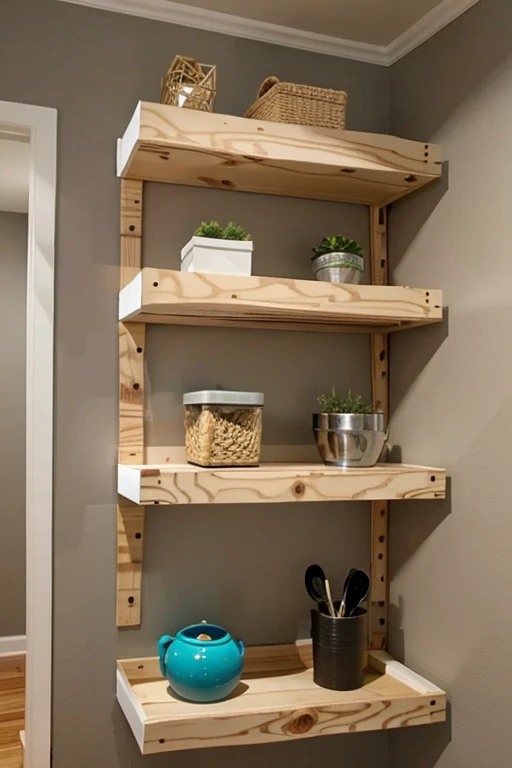
When it comes to choosing the right materials for DIY floating shelves, it’s essential to consider both aesthetics and functionality. Opting for high-quality wood like oak, pine, or walnut can provide a sturdy and visually appealing foundation for your shelves. These types of wood not only support heavy items but also add a touch of natural beauty to your space. If you’re aiming for a more budget-friendly option, plywood or MDF (medium-density fiberboard) can also be effective, especially when painted or veneered to mimic more expensive materials.
In addition to wood, you’ll need to select the appropriate brackets and hardware to ensure your floating shelves are secure. Heavy-duty metal brackets are often the best choice for supporting the weight of the shelves and their contents. Look for hidden brackets that provide strong support while maintaining a sleek, minimalist appearance. Make sure the screws and anchors you use are compatible with your wall type—whether it’s drywall, plaster, or brick—to ensure a safe and stable installation.
Lastly, consider the finish and sealant for your shelves. A good quality stain or paint can enhance the wood’s natural beauty while protecting it from wear and tear. Adding a clear sealant will further help in preserving the wood and making it easier to clean. By carefully selecting the right materials, you can create durable and stylish DIY floating shelves that will elevate the look of any room in your home.
Transforming your space with stylish DIY floating shelves is a fantastic way to elevate your home’s decor while maximizing storage. These sleek and modern shelves create the illusion of floating on your wall, adding a touch of sophistication and functionality to any room. Whether you need a place to display your favorite books, plants, or decorative items, floating shelves offer a versatile solution that can be customized to fit your unique style and needs.
Creating your own DIY floating shelves is simpler than you might think. With just a few materials like wooden boards, brackets, and some basic tools, you can craft beautiful shelves that perfectly match your interior design. Not only will you save money by doing it yourself, but you’ll also enjoy the satisfaction of creating something with your own hands. Plus, floating shelves can be installed in virtually any room, from the living room to the bedroom, kitchen, or even the bathroom, making them a practical addition to your home.
To get started, choose a sturdy wood that complements your existing decor. Measure and cut the wood to your desired length, then sand and finish it to achieve a polished look. Secure the brackets to the wall and mount the shelves, ensuring they are level and properly anchored. By following these simple steps, you can transform any blank wall into an eye-catching focal point that enhances both style and storage in your home.
Step-by-Step Guide to Installing Floating Shelves
Installing floating shelves can be a simple and rewarding DIY project that adds both functionality and style to your space. To get started, you’ll need a few basic tools: a level, a drill, wall anchors, screws, and a stud finder. First, use the stud finder to locate the studs in your wall; this ensures that your shelves will be securely anchored. Mark the positions of the studs with a pencil.
Next, hold the shelf bracket against the wall at your desired height and mark where the screws will go. Use the level to make sure everything is perfectly straight. Drill pilot holes into the stud marks and insert wall anchors if you’re not hitting a stud directly. Secure the brackets to the wall using screws. Finally, slide your floating shelf onto the brackets and ensure it’s firmly in place. Double-check with the level to make sure everything is even, and you’re done!
By following these steps, you can easily install floating shelves that not only look great but also provide practical storage solutions. For more detailed instructions and tips on choosing the right materials, visit our comprehensive DIY guide on floating shelves.
Transforming your living space can be a breeze with the addition of stylish DIY floating shelves. These versatile shelves not only add a modern touch to any room but also provide practical storage solutions that help declutter your home. Whether you’re looking to display your favorite books, showcase decorative pieces, or store everyday essentials, floating shelves can seamlessly blend functionality with aesthetics.
Creating your own floating shelves is easier than you might think. With just a few basic materials like wood planks, brackets, and a drill, you can craft custom shelves that perfectly fit your space and style. Plus, the sense of accomplishment from building something with your own hands adds a personal touch to your home decor. Follow simple step-by-step guides available online, and you’ll have chic, sturdy shelves up in no time.
Optimizing your space with DIY floating shelves not only enhances the visual appeal of your home but also improves organization. By elevating items off the floor and onto the walls, you create a more open and airy atmosphere. This simple yet effective home improvement project is a cost-efficient way to refresh your living area while adding valuable storage options. Start your DIY journey today and see the difference floating shelves can make!
Creative Design Ideas for Floating Shelves in Different Rooms
Floating shelves offer a versatile and stylish solution for displaying items and maximizing space in any room. In the living room, consider arranging floating shelves in a staggered pattern to showcase books, plants, or decorative pieces, creating an eye-catching focal point. For a more minimalist look, use sleek, narrow shelves that blend seamlessly with the wall color. In the kitchen, floating shelves can replace traditional cabinets, providing easy access to everyday items like dishes and glassware. Opt for natural wood or metal finishes to complement your kitchen decor and add a modern touch.
In the bathroom, floating shelves can be both functional and decorative. Use them to store essentials like towels, toiletries, and small plants to bring a spa-like feel to the space. Installing shelves above the toilet or next to the vanity can make use of otherwise wasted vertical space. For children’s rooms or home offices, floating shelves can help keep the area organized while adding a playful or professional touch. Utilize colorful shelves for a fun look in kids’ rooms or sleek, neutral tones in an office setting to maintain a clean and efficient workspace.
By incorporating floating shelves into different rooms of your home, you can enhance both style and functionality. Whether you prefer a rustic, modern, or eclectic design, there’s a floating shelf solution that will fit your needs and elevate your space. Remember to balance aesthetics with practicality by considering the weight and type of items you’ll be storing on your shelves.
Transforming your space with stylish DIY floating shelves is a fantastic and budget-friendly way to enhance both the functionality and aesthetics of your home. Floating shelves are a modern design trend that creates the illusion of shelves suspended in mid-air without visible brackets, providing a sleek, clean look. They are perfect for displaying your favorite books, plants, or decorative items while freeing up floor space. With a few basic tools and materials, you can easily build and install these shelves yourself, adding a personalized touch to your living room, bedroom, or even bathroom.
To start your DIY project, you’ll need some essential supplies such as wooden boards, brackets (hidden ones for that floating effect), screws, a drill, and a level. Begin by measuring the desired length and width of your shelves and cutting the wooden boards accordingly. Sand them for a smooth finish and paint or stain them to match your interior design. Next, mark the positions on the wall where you want to install the shelves, ensuring they are level and evenly spaced. Secure the hidden brackets to the wall studs for maximum support and then attach the wooden boards to these brackets.
Not only do floating shelves add a contemporary vibe to your home decor, but they also offer practical storage solutions. By optimizing wall space, you can keep your floors clutter-free and create a more organized environment. Whether you’re aiming for a minimalist look or a cozy, rustic feel, DIY floating shelves can be customized to suit any style. So why not give it a try? With a little effort, you can transform any room into a chic and functional space that reflects your personal taste.
Maximizing Small Spaces with Floating Shelves
Maximizing small spaces with floating shelves is an ingenious way to enhance both the functionality and aesthetics of your home. Floating shelves are wall-mounted units that provide storage without the need for bulky furniture, making them perfect for small spaces. By installing these sleek, minimalist shelves, you can keep your floors clear and make your room appear more open and organized. Whether you use them to display decorative items, store books, or house everyday essentials, floating shelves help you utilize every inch of space efficiently.
One of the key advantages of floating shelves is their versatility. They can be installed in virtually any room—from kitchens and bathrooms to living rooms and bedrooms—allowing you to adapt them to your specific needs. In a tight kitchen, for example, floating shelves can replace traditional cabinets to store dishes and cookware while keeping the area airy and spacious. In a small bedroom, they can function as nightstands or additional storage for personal items without taking up valuable floor space.
Moreover, floating shelves offer a stylish solution that blends seamlessly with various interior design styles. Available in a wide range of materials, colors, and finishes, they can complement any decor, from modern and contemporary to rustic and industrial. By strategically placing floating shelves at different heights and combining them with other storage solutions, you can create a visually appealing and highly functional environment tailored to your lifestyle.
Transform your space and add a touch of modern elegance with stylish DIY floating shelves. These versatile shelves are not only functional but also aesthetically pleasing, making them perfect for any room in your home. Whether you want to display your favorite books, showcase decorative items, or create extra storage, floating shelves provide a sleek and minimalist solution that seamlessly blends with any decor. Plus, building them yourself can be a fun and rewarding project that allows you to customize the shelves to fit your specific needs and style preferences.
To get started on your DIY floating shelves, you’ll need some basic materials such as wooden boards, brackets, screws, and a level. Begin by measuring the area where you want the shelves to go and cutting the wooden boards to the desired length. Next, attach the brackets to the wall, ensuring they are level and securely anchored. Finally, place the wooden boards on top of the brackets and screw them into place. With just a few simple steps, you’ll have beautiful floating shelves that not only enhance your space but also provide practical storage solutions.
By incorporating DIY floating shelves into your home decor, you can create a visually appealing and organized environment. These shelves are perfect for small spaces where traditional shelving might be too bulky. They also offer endless styling possibilities, from arranging potted plants in the living room to organizing kitchen essentials in a tidy manner. Embrace your creativity and transform any room with these easy-to-build, stylish floating shelves that combine form and function seamlessly.
Budget-Friendly DIY Floating Shelf Projects
Looking to revamp your home decor without breaking the bank? Budget-friendly DIY floating shelf projects are an excellent way to add both functionality and style to any room. These easy-to-make shelves not only offer extra storage space but also serve as a perfect display for your favorite decorative items. With just a few basic materials like wood planks, brackets, and screws, you can create custom shelves that fit your unique taste and space requirements.
One of the best things about DIY floating shelves is their versatility. You can paint or stain them to match existing furniture or go bold with a contrasting color for a pop of visual interest. Plus, these shelves can be installed in various configurations to suit any room, whether it’s the kitchen, living room, or even the bathroom. By following simple step-by-step guides available online, you can easily complete these projects over a weekend, making it an ideal activity for beginners and seasoned DIY enthusiasts alike.
Incorporating budget-friendly DIY floating shelves into your home decor not only enhances your living space but also gives you the satisfaction of creating something with your own hands. So why wait? Gather your materials and get started on a project that combines practicality with creativity, transforming your home into a stylish and organized haven.
Transforming your living space can be as easy as adding stylish DIY floating shelves. These sleek, modern shelves not only provide practical storage solutions but also enhance the aesthetic appeal of any room. By mounting them directly to the wall without visible brackets, floating shelves create a minimalist look that’s perfect for showcasing your favorite decor, books, or plants. Whether you’re aiming for a contemporary vibe or a rustic charm, floating shelves can be tailored to fit your unique style.
Creating your own floating shelves is a straightforward project that requires just a few materials and tools. Start by selecting high-quality wood that complements your existing decor. Measure and cut the wood to your desired dimensions, then sand and finish it to achieve a polished look. Installing the shelves involves attaching hidden brackets or using specialized mounting kits to ensure they are securely fastened to the wall. With a bit of effort and creativity, you can transform any room into a beautifully organized and stylish space.
Not only do DIY floating shelves add functionality and flair to your home, but they also offer an affordable way to refresh your interiors. By taking on this simple project, you can personalize your space while maximizing storage and display options. So why wait? Gather your materials and start crafting your own floating shelves today for a chic and clutter-free home.
Styling Tips for Decorating Your Floating Shelves
Styling your floating shelves can elevate the look of any room, making it both functional and visually appealing. Start by mixing different elements like books, plants, and decorative objects to create a balanced look. Arrange items in varying heights and shapes to add depth and interest. For instance, place a taller vase next to shorter books or a small plant to create a dynamic display. This not only draws the eye but also makes the shelf look more curated and intentional.
Color coordination is another key aspect of styling floating shelves. Stick to a cohesive color palette that complements the room’s overall decor. Using neutral tones with pops of color can make your shelves stand out without overwhelming the space. Additionally, incorporating textures like woven baskets or ceramic pots can add a tactile element that enhances the visual appeal.
Lastly, don’t overcrowd your shelves. Leave some breathing room between items to avoid a cluttered look. This allows each piece to shine on its own while contributing to the overall aesthetic. Regularly updating your shelf decor keeps the space fresh and inviting, making it an ever-evolving centerpiece in your home.
Transforming your space with stylish DIY floating shelves is a fantastic way to add both functionality and aesthetic appeal to any room. These versatile shelves not only provide extra storage but also create a modern, clutter-free look by making use of vertical space. The best part? You can easily customize them to fit your decor style, whether it’s rustic, minimalist, or industrial.
To get started, you’ll need a few basic materials: wood planks, brackets, screws, and wall anchors. First, measure and cut the wood to your desired shelf length. Next, attach the brackets to the wall using screws and wall anchors for added stability. Finally, secure the wood planks onto the brackets. Voila! You now have chic floating shelves that can display anything from books and plants to art pieces and kitchen essentials.
By following these simple steps, you can effortlessly enhance the look and functionality of your living space. Not only are DIY floating shelves cost-effective, but they also offer a personalized touch that store-bought options often lack. So why wait? Start your DIY project today and watch your space transform into a stylish haven.
Safety Tips and Weight Limits for Floating Shelves
When installing floating shelves, it’s crucial to prioritize safety and understand weight limits to ensure a secure and lasting setup. Start by selecting the right wall anchors and brackets suitable for the type of wall you have, whether it’s drywall, plaster, or brick. Always use a stud finder to locate wall studs for added support, especially for heavier items. Incorrect installation can lead to accidents and damage to your walls and belongings.
It’s equally important to adhere to weight limits specified by the manufacturer. Overloading floating shelves can cause them to sag or even collapse. As a general rule, standard floating shelves typically support between 30-50 pounds when properly installed, but always check the product specifications. Distribute weight evenly and avoid placing heavy items on one side of the shelf. Following these guidelines will help you create a safe and stylish storage solution in your home.
Transform your space with these stylish DIY floating shelves that not only enhance the aesthetic appeal of your home but also provide functional storage solutions. Floating shelves are a popular choice among homeowners looking to maximize space without compromising on style. These shelves appear to “float” on the wall with no visible brackets, offering a sleek and modern look. Whether you’re a seasoned DIY enthusiast or a beginner, building and installing floating shelves is a straightforward project that can be completed with basic tools and materials.
To get started, you’ll need some sturdy wood planks, wall brackets, screws, and a drill. Begin by measuring the space where you want to install the shelves and cutting the wood to fit. Attach the brackets to the wall, ensuring they are level and securely anchored. Then, simply place the wood planks onto the brackets and secure them in place. You can customize your shelves by painting or staining the wood to match your existing décor. Not only will these DIY floating shelves help you organize your belongings, but they will also add a touch of sophistication to any room.
Incorporating floating shelves into your home design is an easy and cost-effective way to revamp your living space. They are perfect for displaying books, plants, photos, or any decorative items that reflect your personal style. Plus, because they don’t take up floor space, they are ideal for small apartments or rooms where every inch counts. With just a few simple steps, you can create beautiful and practical storage that transforms your home into a more organized and inviting place. So why wait? Start your DIY floating shelf project today and enjoy both the visual and functional benefits they bring!
Combining Floating Shelves with Other Storage Solutions
Combining floating shelves with other storage solutions can significantly enhance both the functionality and aesthetic appeal of any room. By integrating these sleek, wall-mounted shelves with other storage options like cabinets, baskets, or hooks, you create a versatile and organized space that maximizes every inch. For instance, placing floating shelves above a cabinet can provide additional surface area for displaying decorative items or storing frequently used essentials. This layered approach not only optimizes storage but also adds a dynamic visual interest to your interior design.
When considering this combination, think about the balance between open and closed storage. Floating shelves are perfect for showcasing items you want to keep visible, such as books, plants, or collectibles. Meanwhile, cabinets or baskets can hide away clutter and less attractive necessities. This mix ensures that your space remains tidy while still reflecting your personal style. Additionally, using matching materials or complementary colors can unify the look, making the transition between different storage types seamless and cohesive.
Incorporating hooks into your storage solution further enhances practicality, especially in entryways or kitchens. Hooks can hold items like coats, bags, or kitchen utensils, keeping them within easy reach while freeing up shelf and cabinet space. By thoughtfully combining floating shelves with other storage solutions, you create a well-organized environment that is both stylish and highly functional. This approach ensures that every item has its place, contributing to a clutter-free and visually appealing home.
—
This explanation is designed to be clear and straightforward, making it easy to understand for a wide audience while incorporating SEO-friendly terms related to home organization and interior design. Let me know if you need more details on any specific aspect!
Transform your space with these stylish DIY floating shelves and elevate your home’s decor effortlessly. Floating shelves are not only functional but also add a modern touch to any room. These shelves appear to “float” on the wall without visible brackets, creating a sleek and clean look. Whether you want to display your favorite books, plants, or decorative items, floating shelves provide a versatile solution that fits any style.
Creating your own floating shelves can be a fun and rewarding project that saves money while allowing you to customize the size, shape, and color to match your decor perfectly. All you need are some basic tools, wooden boards, brackets, and screws. Follow a step-by-step guide to measure, cut, and assemble your shelves securely on the wall. The result is a stunning display that maximizes space and keeps your items organized.
By opting for DIY floating shelves, you can transform empty wall space into a focal point that reflects your personality and creativity. Not only do they enhance the aesthetic appeal of your home, but they also provide practical storage solutions. So, roll up your sleeves and start this simple DIY project to give your living space the stylish upgrade it deserves!
Eco-Friendly Options for DIY Floating Shelves
Eco-Friendly Options for DIY Floating Shelves
Transforming your living space with stylish, eco-friendly DIY floating shelves is easier than you might think. Opt for reclaimed wood to give your shelves a rustic charm while reducing waste. Reclaimed wood can be sourced from old barns, factories, or even pallets, offering unique textures and history that mass-produced materials can’t match. Additionally, using water-based stains and finishes minimizes harmful emissions, making your project safer for both you and the environment.
Another excellent eco-friendly option is bamboo. Known for its rapid growth and sustainability, bamboo is a fantastic alternative to traditional hardwood. It’s strong, durable, and provides a clean, modern aesthetic to your floating shelves. Pairing bamboo with recycled metal brackets not only enhances the shelf’s durability but also adds an industrial touch to your decor. By choosing these sustainable materials, you contribute to a healthier planet while creating beautiful, functional storage solutions in your home.
Lastly, consider upcycling existing furniture or materials you already have at home. Old drawers, doors, or even skateboard decks can be transformed into unique floating shelves with a bit of creativity and effort. This approach reduces the need for new materials and gives new life to items that might otherwise end up in a landfill. By focusing on eco-friendly options for your DIY floating shelves, you create a stylish, personalized space that aligns with sustainable living principles.
Soar Above the Ordinary: The Allure of Luxury Private Jets
For the discerning traveler, a commercial flight can feel like a crowded cattle car. Long security lines, inflexible schedules, and the constant jostle for overhead bin space are simply unacceptable. If you value privacy, efficiency, and unparalleled comfort, then luxury private jets offer the ultimate travel experience.
Imagine stepping onto your personal aircraft, immaculately tailored to your desires. Plush leather seats cradle you in comfort, while ample cabin space allows you to stretch out and work, relax, or unwind. Flight attendants, anticipating your every need, ensure a seamless journey.
Luxury private jets boast features that redefine air travel. Built-in conference areas transform your flight into a productive workspace. State-of-the-art entertainment systems keep you engaged, while high-speed Wi-Fi lets you stay connected throughout your travels.
But the true advantage lies in unmatched control. Forget the limitations of commercial airlines. Choose your departure and arrival times, breeze through private terminals, and land directly at smaller airports closer to your final destination. Luxury private jets open a world of possibilities, allowing you to explore remote locations and hidden gems inaccessible by commercial flights.
Whether you’re a busy CEO on a global business trip, a family embarking on a dream vacation, or simply someone who values exclusivity and efficiency, luxury private jets redefine the concept of travel. It’s not just about reaching your destination; it’s about experiencing the journey in unparalleled comfort and style.